- Return to book
- Review this book
- About the author
- 介紹
- 1. 網際網路(Internet)是如何運作的?
- 2. 命令行(command-line)簡介
- 3. 安裝 Python
- 4. 初試 Python
- 5. 什麼是 Django?
- 6. 安裝 Django
- 7. 程式碼編輯器
- 8. 開始一個 Django 專案
- 9. Django models
- 10. Django ORM (Querysets)
- 11. Django admin
- 12. Deploy!
- 13. Django urls
- 14. Django views - time to create!
- 15. Introduction to HTML
- 16. Dynamic data in templates
- 17. Django templates
- 18. CSS - make it pretty
- 19. Template extending
- 20. Extend your application
- 21. Django Forms
- 22. Domain
- 23. What's next?
CSS - make it pretty!
Our blog still looks pretty ugly, right? Time to make it nice! We will use CSS for that.
What is CSS?
Cascading Style Sheets (CSS) is a language used for describing the look and formatting of a website written in markup language (like HTML). Treat it as make-up for our webpage ;).
But we don't want to start from scratch again, right? We will, once more, use something that has already been done by programmers and released on the Internet for free. You know, reinventing the wheel is no fun.
Let's use Bootstrap!
Bootstrap is one of the most popular HTML and CSS frameworks for developing beautiful websites: http://getbootstrap.com/
It was written by programmers who worked for Twitter and is now developed by volunteers from all over the world.
Install Boostrap
To install Bootstrap, you need to add this to your <head> in your .html file (blog/templates/blog/post_list.html):
<link rel="stylesheet" href="//maxcdn.bootstrapcdn.com/bootstrap/3.2.0/css/bootstrap.min.css">
<link rel="stylesheet" href="//maxcdn.bootstrapcdn.com/bootstrap/3.2.0/css/bootstrap-theme.min.css">
<script src="//maxcdn.bootstrapcdn.com/bootstrap/3.2.0/js/bootstrap.min.js"></script>
This doesn't add any files to your project. It just points to files that exist on the internet. Just go ahead, open your website and refresh the page. Here it is!
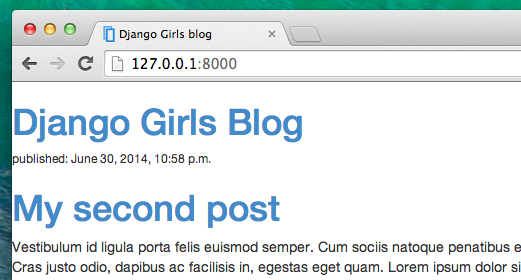
Looking nicer already!
Static files in Django
Another thing you will learn about today is called static files. Static files are all your CSS and images -- files that are not dynamic, so their content doesn't depend on request context and will be the same for every user.
CSS is a static file, so in order to customize CSS, we need to first configure static files in Django. You'll only need to do it once. Let's start:
Configure static files in Django
First, we need to create a directory to store our static files in. Go ahead and create a directory called static inside your djangogirls directory.
djangogirls
├─── static
└─── manage.py
Open up the mysite/settings.py file, scroll to the bottom of it and add the following lines:
STATICFILES_DIRS = (
    os.path.join(BASE_DIR, "static"),
)
This way Django will know where to find your static files.
Your first CSS file!
Let's create a CSS file now, to add your own style to your web-page. Create a new directory called css inside your static directory. Then create a new file called blog.css inside this css directory. Ready?
static
└─── css
        blog.css
Time to write some CSS! Open up the static/css/blog.css file in your code editor.
We won't be going too deep into customizing and learning about CSS here, because it's pretty easy and you can learn it on your own after this workshop. We really recommend doing this Codeacademy HTML & CSS course to learn everything you need to know about making your websites more pretty with CSS.
But let's do at least a little. Maybe we could change the color of our header? To understand colors, computers use special codes. They start with # and are followed by 6 letters (A-F) and numbers (0-9). You can find color codes for example here: http://www.colorpicker.com/. You may also use predefined colors, such as red and green.
In your static/css/blog.css file you should add following code:
h1 a {
    color: #FCA205;
}
h1 a is a CSS Selector. Any a element inside of an h1 element (i.e. when we have in code something like: <h1><a href="">link</a></h1>) is the tag we're applying our styles to, and we're telling it to change its color to #FCA205, which is orange. Of course, you can put your own color here!
In a CSS file we determine styles for elements in the HTML file. The elements are identified by the element name (i.e. a, h1, body), the attribute class or the attribute id. Class and id are names you give the element by yourself. Classes define groups of elements, and ids point to specific elements. For example, the following tag may be identified by CSS using the tag name a, the class external_link, or the id link_to_wiki_page:
<a href="http://en.wikipedia.org/wiki/Django" class="external_link" id="link_to_wiki_page">
Read about CSS Selectors in w3schools.
Then, we need to also tell our HTML template that we added some CSS. Open the blog/templates/blog/post_list.html file and add this line at the very beginning of it:
{% load staticfiles %}
We're just loading static files here :). Then, between the <head> and </head>, after the links to the Bootstrap CSS files (the browser reads the files in the order they're given, so code in our file may override code in Bootstrap files), add this line:
<link rel="stylesheet" href="{% static 'css/blog.css' %}">
We just told our template where our CSS file is located.
Your file should now look like this:
{% load staticfiles %}
<html>
    <head>
        <title>Django Girls blog</title>
        <link rel="stylesheet" href="//maxcdn.bootstrapcdn.com/bootstrap/3.2.0/css/bootstrap.min.css">
        <link rel="stylesheet" href="//maxcdn.bootstrapcdn.com/bootstrap/3.2.0/css/bootstrap-theme.min.css">
        <script src="//maxcdn.bootstrapcdn.com/bootstrap/3.2.0/js/bootstrap.min.js"></script>
        <link rel="stylesheet" href="{% static 'css/blog.css' %}">
    </head>
    <body>
        <div>
            <h1><a href="/">Django Girls Blog</a></h1>
        </div>

        {% for post in posts %}
            <div>
                <p>published: {{ post.published_date }}</p>
                <h1><a href="">{{ post.title }}</a></h1>
                <p>{{ post.text }}</p>
            </div>
        {% endfor %}
    </body>
</html>
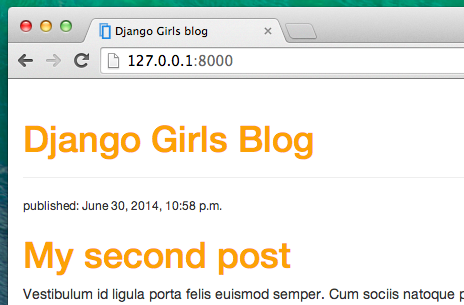
OK, save the file and refresh the site!
Nice work! Maybe we would also like to give our website a little air and increase the margin on the left side? Let's try this!
body {
    padding-left: 15px;
}
Add this to your CSS, save the file and see how it works!
Maybe we can customize the font in our header? Paste this into your <head> in blog/templates/blog/post_list.html file:
<link href="http://fonts.googleapis.com/css?family=Lobster&subset=latin,latin-ext" rel="stylesheet" type="text/css">
This line will import a font called Lobster from Google Fonts (https://www.google.com/fonts).
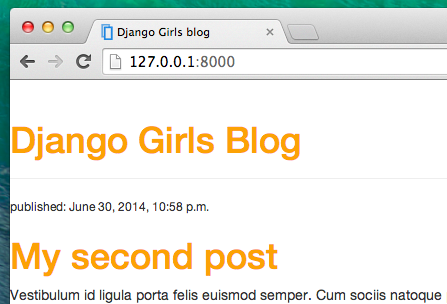
Now add the line font-family: 'Lobster'; in the CSS file static/css/blog.css inside the h1 a declaration block (the code between the braces { and }) and refresh the page:
h1 a {
    color: #FCA205;
    font-family: 'Lobster';
}
Great!
As mentioned above, CSS has a concept of classes, which basically allows you to name a part of the HTML code and apply styles only to this part, not affecting others. It's super helpful if you have two divs, but they're doing something very different (like your header and your post), so you don't want them to look the same.
Go ahead and name some parts of the HTML code. Add a class called page-header to your div that contains your header, like this:
<div class="page-header">
    <h1><a href="/">Django Girls Blog</a></h1>
</div>
And now add a class post to your div containing a blog post.
<div class="post">
    <p>published: {{ post.published_date }}</p>
    <h1><a href="">{{ post.title }}</a></h1>
    <p>{{ post.text }}</p>
</div>
We will now add declaration blocks to different selectors. Selectors starting with . relate to classes. There are many great tutorials and explanations about CSS on the Web to help you understand the following code. For now, just copy and paste it into your mysite/static/css/blog.css file:
.page-header {
    background-color: #ff9400;
    margin-top: 0;
    padding: 20px 20px 20px 40px;
}

.page-header h1, .page-header h1 a, .page-header h1 a:visited, .page-header h1 a:active {
    color: #ffffff;
    font-size: 36pt;
    text-decoration: none;
}

.content {
    margin-left: 40px;
}

h1, h2, h3, h4 {
    font-family: 'Lobster', cursive;
}

.date {
    float: right;
    color: #828282;
}

.save {
    float: right;
}

.post-form textarea, .post-form input {
    width: 100%;
}

.top-menu, .top-menu:hover, .top-menu:visited {
    color: #ffffff;
    float: right;
    font-size: 26pt;
    margin-right: 20px;
}

.post {
    margin-bottom: 70px;
}

.post h1 a, .post h1 a:visited {
    color: #000000;
}
Then surround the HTML code which displays the posts with declarations of classes. Replace this:
{% for post in posts %}
    <div class="post">
        <p>published: {{ post.published_date }}</p>
        <h1><a href="">{{ post.title }}</a></h1>
        <p>{{ post.text }}</p>
    </div>
{% endfor %}
in the blog/templates/blog/post_list.html with this:
<div class="content">
    <div class="row">
        <div class="col-md-8">
            {% for post in posts %}
                <div class="post">
                    <p>published: {{ post.published_date }}</p>
                    <h1><a href="">{{ post.title }}</a></h1>
                    <p>{{ post.text }}</p>
                </div>
            {% endfor %}
        </div>
    </div>
</div>
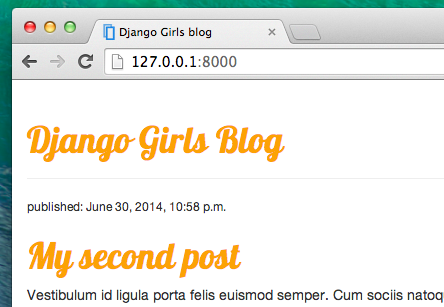
Save those files and refresh your website.
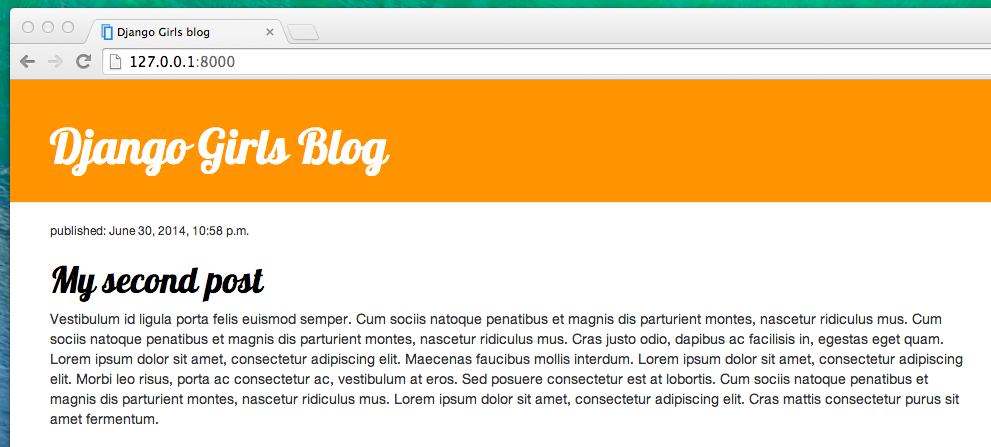
Wohoo! Looks awesome, right? The code we just pasted is not really so hard to understand and you should be able to understand most of it just by reading it.
Don't be afraid to tinker with this CSS a little bit and try to change some things. If you break something, don't worry, you can always undo it!
Anyway, we really recommend taking this free online Codeacademy HTML & CSS course as some post-workshop homework to learn everything you need to know about making your websites prettier with CSS.
Ready for the next chapter?! :)